Raw fiberglass edge trim?

Raw fiberglass edge trim?
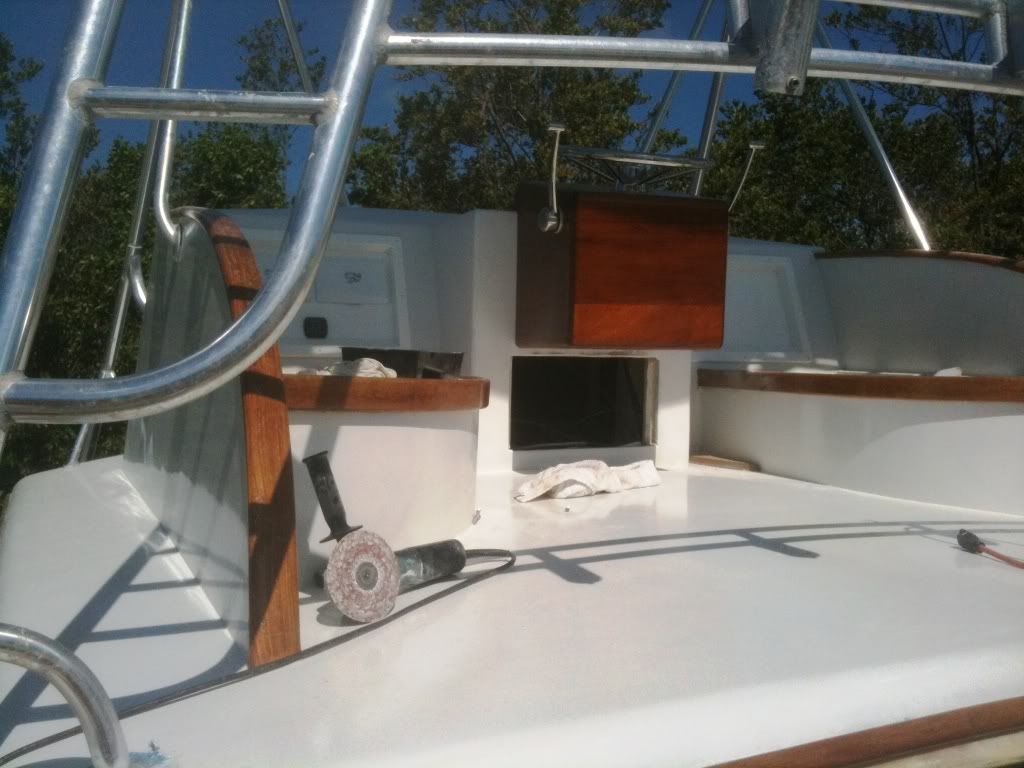
I am presently sanding "Phoenix" in preparation to painting her, and have decided I want to remove the original aluminum "J" shaped molding around the raw fiberglas edges (around the edges of the windshield overhang and window recesses for example) that is pop-riveted in place. There are a few breaks and missing pieces in the present molding, so I am not interested in salvaging it. Do any of you have any suggestions for replacing it? I have found several plastic extrusion manufacturers who make edge trim in various "U" shaped profiles, which I believe I could glue in place, that would look better than metal edging which needs screws or pop-rivets, but I am concerned about how durable this might be on the exterior of a boat. This material is used as edging for automobile doors, for instance, and can be had with a chrome looking finish, or in black, which could be painted. Stainless or aluminum are also options, but I think the absence of visible fastenings would look best. Any and all comments would be appreciated.
Frank B - IRGuy@aol.com "Phoenix" 1983 FBC Cummins 6Bs - 315HP Wilmington, NC

Frank, Take a look around this site. I think it was Bill D. that posted the link recently. Al http://www.brunnerent.com/default.asp?reset=1
1978 33 FBC NITES OFF

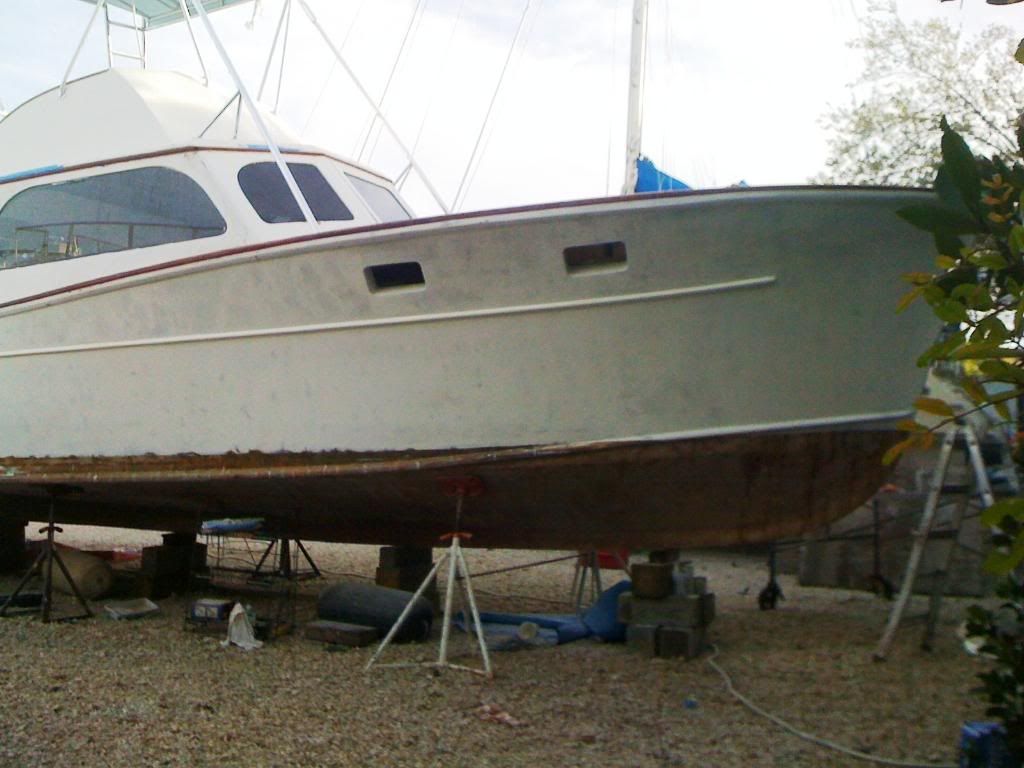
Thanks Al... I did check there, but thought I should see what other ideas the rest of the forum had. Two guys on the B31 forum suggested sanding the rough edges and painting them when the rest of the boat gets painted.. I could do this but later add moldings if they don't turn out well. Buzz... Without getting too deep into things, "Phoenix" is presently inside a large building where several independant guys are repairing and building boats. I rent space there for my boat and am working on it myself. I have known for several years one of the guys who has a boat repair business there, and he will do the actual spray painting when my prep work is finished. I presently am sanding (actually removing) the coat of paint the doofus previous owner applied with a nap roller. He never tipped the wet paint, so it is rough, has runs and bare spots, and collects dirt like crazy. It is a once-in-a-lifetime thing.. I expect to never, ever again sand off a coat of paint from a whole boat! The guy who will paint the boat does great work, I have seen several of his finished boats, and at the present time he seems to be leaning toward spraying "AwlCraft 2000".. made by the AwlGrip people, but it is somewhat softer than regular AwlGrip, meaning it can be touch-up repaired. Regular AwlGrip is almost impossible to touch up. We will use their 545 Epoxy primer, since all my patching and filling has been done with epoxy. I have done quite a few other things since we last spoke.. including taking the original dual engine controls out and replaced them with two lever dual function controls. I also replaced the transmission shift cables. The empty space left by the original transmission shift control will be used by a new switch panel I am installing. I am completely rewiring everything on the flybridge, and have already installed a new 12 volt distribution panel there. It will power all lights, nav instruments, horn, engine room blowers, the aftmost bilge pump, etc, etc. I will have 12 circuits available, and will keep at least two as spares. One more thing! The tapered black stripes down the cabin sides are gone! I removed the last of them today! Good riddance.. I never liked them!
Frank B - IRGuy@aol.com "Phoenix" 1983 FBC Cummins 6Bs - 315HP Wilmington, NC
Frank, Sounds like an awesome upgrade, you've got to send some pic's of this process. Wish I could help with the Edge Trim, but will definitely keep an eye out. Good luck with the painting ! Rick Ticket 85 SF Merc 454 MPI's Falmouth, MA
Rick
Ticket 85 SF Merc 454 MPI's USCG 50T Masters w/ Towing Endorsement
Falmouth, MA
Ticket 85 SF Merc 454 MPI's USCG 50T Masters w/ Towing Endorsement
Falmouth, MA
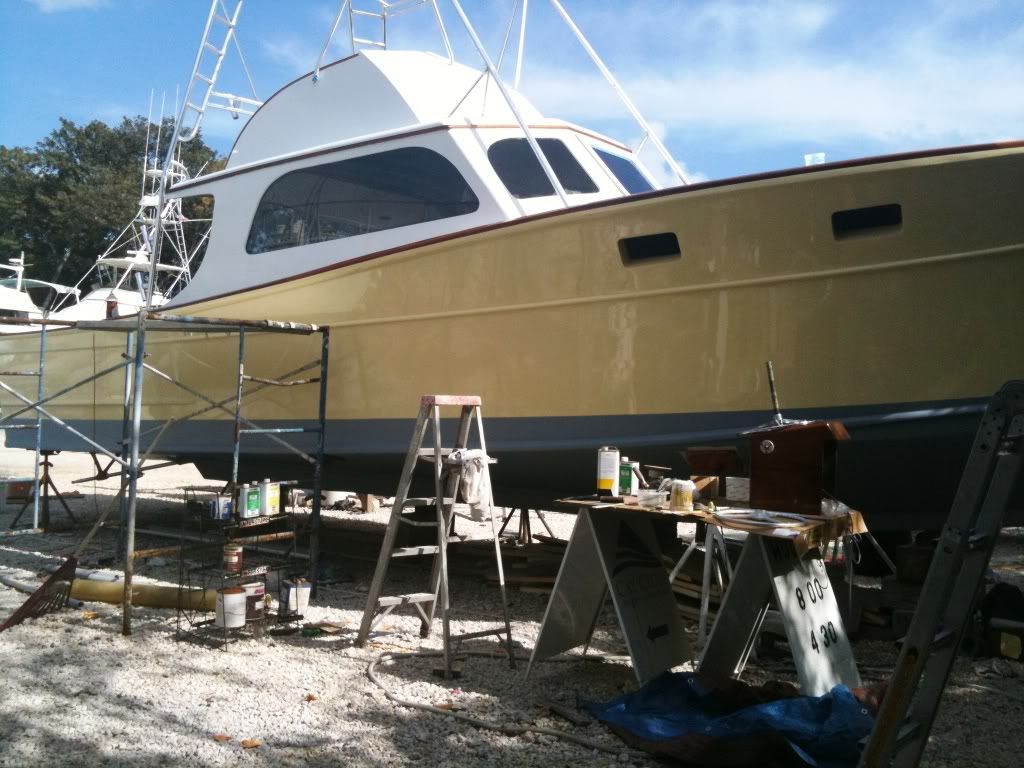
Thanks Rick... I will try to take some pictures, but the boat really looks like crap these days. There is dust everywhere in the building, and as much as I try to keep the decks clean they are a mess with tools, power cords and air hoses everywhere. I am alongside an 80 something foot boat that is almost complete but has sat there for over three years with sheet plastic draped over her with no work being done, so "Phoenix" looks tiny. (But I can tell you she isn't tiny when you are sanding her!). I was originally going to do a normal surface sanding and paint her myself with traditional single part paint, since she had been painted by the doofus previous owner with a one part paint, but he didn't know what type it was(all he could tell me was it came from West and had a green label!)but after talking with the guy who will paint her I decided to bite the bullet and do a complete removal and start from the gel coat with state of the art two part polyurethane. The hull had been painted professionally from the rub rail down by a yard when the previous owner first bought her about 14 years ago, and still looks surprisingly good, and we think it is AwlGrip, so we plan to paint over the existing paint after a good surface sanding.
Frank B - IRGuy@aol.com "Phoenix" 1983 FBC Cummins 6Bs - 315HP Wilmington, NC


[IMG]http://i248.photobucket.com/albums/gg19 ... 010014.jpg[/IMG] I will loan you my sander.... The 60 grit will make fast work of the paint. Are you going to 545 the hull and then sand again or a 300 grit and apply paint on top of the old paint?
Captain Larry Wren 305-360-4900 www.apirateschoice.com 
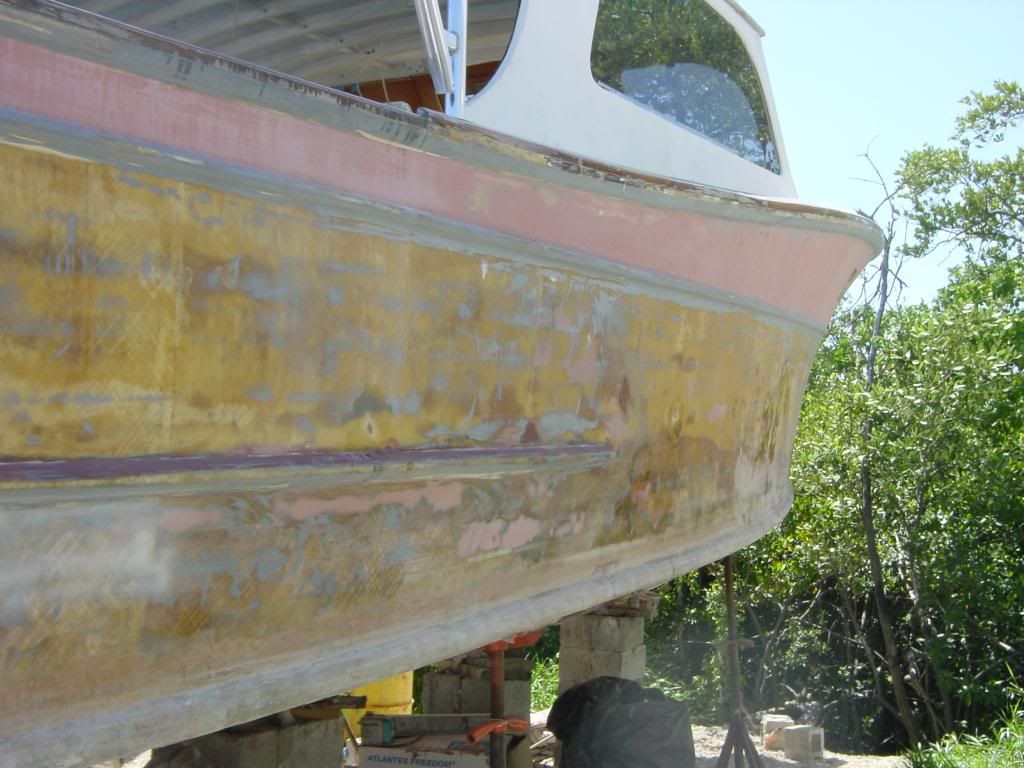
Larry... Nice work in the picture! I thought about a pod like yours but decided to simply put the two shift/throttle levers to starboard of the wheel, where the original throttle levers were. Thanks for the sander offer, but I have more sanders these days than one man should have. For everything above the rubrail my procedure is to first (and CAREFULLY) hit the surface with a variable speed Makita 8" rotary sander/polisher with 100 grit at about 500-700 RPM, taking off most but not all of the paint, then use a 6" random orbit air powered sander with 80 grit open discs (like the body shop guys use) at high speed to completely remove the remaining white paint. In small or odd shaped areas I have been using a Bosch electric oscillating sander with quarter sheets of 80 grit, or for small areas I use a Fein Multitool with 80 grit triangular or finger pads. Next I use thickened epoxy to patch all the dings and gouges (I did say use the 8" rotary sanded CAREFULLY). Then I will do a quick once over with most likely 120 grit. Then will spray a coat of 545 and sand lightly with probably 120 or 150. This will leave the topsides ready for final coats of Awlcraft 2000. I haven't discussed the hull painting procedure with the painter yet, but I suspect since the existing paint looks sound we will patch the few dings and scratches, prime these areas, sand with something between 180 and 300, and paint over what remains. Cliff... After looking at a lot of pics in magazines my wife and I agree the hull will be Fighting Lady Yellow, with everything above the rubrail white. We looked at hull colors of blue, aqua, green, grey and beige, but we decided yellow looks the best. I have already stripped the aluminum window frames, washed them with acetone, then a coat of Alumaprep, then a coat of Alodine, then two brushed coats of aluminum paint. This looks rather "streaky", so I will give it a light sanding and then spray a final coat of aluminum paint. I already removed the windows in the cabin aft bulkhead, and replaced them with new glass and made new frames for them which are painted.
Frank B - IRGuy@aol.com "Phoenix" 1983 FBC Cummins 6Bs - 315HP Wilmington, NC
[IMG]http://i248.photobucket.com/albums/gg19 ... e003-1.jpg[/IMG] [IMG]http://i248.photobucket.com/albums/gg19 ... ers005.jpg[/IMG] Nice choice on the color!!!!!!!!!!!!. The 545 calls for no less than a 220 I like 400) grit before coating. The 80 and 100 will leave scratches (plus if you accidentally rock the sander a groove in the gel coat). You are only removing and not fairing the area, nor do you want to. Remember this is your chance to change or repair anything that needs it, the Awlgrip will show everything so any thing that needs filling spend the extra time and fill it.I like to go multiple coats of 545 and then a sand as it will fill and fair some areas that need minor attention. My choice Porter Cable 6" orbital sander. I went over white 5454 primer and what you see is five coats of paint to cover completely.
Captain Larry Wren 305-360-4900 www.apirateschoice.com
Larry... Looks fantastic! Thanks for the info on the final sanding.. we have not discussed the hull painting in any detail yet, but the time is coming soon. I really like the air sander (Porter Cable 6" with a hook and loop pad.. same as yours?).. it is light and easy to use, but occasionally the hose gets in the way. I forgot to mention above that I also have a Bosch 6" random orbit variable speed sander which might be useful on the hull. The painter has talked about a high build primer if it is needed.. he is readily available, since his work area is about 75' from mine. I think he is waiting to see what the results of my sanding/fairing will look like before he tells me what to do next. Did you use regular Awlgrip or the Awlcraft 2000? Whichever, it looks great! Did you do the actual spraying, or did you use someone else? Was the original surface gel coat or had it been painted? Why 5 coats of final paint? Were you trying to cover surface inperfections or get better hiding against the base coat? How much time between coats? Did you have any problems sanding the 545? I understand you should sand it within 24 hours before it really gets cured and hard. I really like the gold lettering on the wood transom.. But for me the less exterior wood the better, I am looking toward less future maintenance, so minimal exposed wood. I did make a new teak door, but it is somewhat protected from the sun by the overhang over the aft cabin bulkhead. I would like to see your Merritt one day.. we have a couple who just stayed with us three weeks ago who live on Big Pine Key, and we have talked about driving down to FL and visiting them one day (after "Phoenix" is finished).
Frank B - IRGuy@aol.com "Phoenix" 1983 FBC Cummins 6Bs - 315HP Wilmington, NC
I have the hard pad that you stick a pre-glued sanding paper to. As to the painting you will find the more primer and whiter the primer the better the final job looks. I had to do 5 coats as the first didn't cover totally. I rolled and tipped the paint and used the same roller for both parts. The trick is to thin the paint to a very thin solution. Then apply enough to cover a two foot section. Come back with the roller almost dry and remove the excess paint. MOVE ON THEN AS YOU CAN"T REVISIT THAT AREA TILL THE NEXT COAT! You need a second person to check for dry spots and watch for any imperfections while you are working in that area before you move on. I did each side of the hull in about an hour. where to break your paint line is a real problem (you are lucky the Bertram's don't have any half rounds or splash rails that have to be done separate breaking the main paint line. I always paint up and down whenever possible. The only problem area on the bertram house are the rounded corners on the fly bridge. You can plan your breaks and tape or tip the break line like cutting a wall in home painting. I have never sprayed anything really but I do know the problem is to much paint at one time will cause drips. Between coat of paint a 500 grit sanding to remove the sheen is needed and you have the chance to fix anything else that needs it. The awlgrip is as thin as mineral spirits when blended properly. You also use a different reducer for spray than brushing. I have had warnings on the hi-build primer that there have been some cracking problem so I used 545 epoxy primer right on top of the bare glass. Up to four coats then sand and reapply if needed. I had to fair the complete hull as my free boards were covered with layers of glass.My boat has no gel coat and there was no paint on the bare glass. Do you know the spray paint and sand to expose any highs of low spots? The Bertram's are smooth and were well faired from the factory and that makes life a lot easier! If not the less dense of a filler the easier to sand (microballoons are easiest) I do all my work with epoxy so the drying time is usually overnight unless I am using Cabosil which speeds up the reaction time. I used regular awlgrip because the 2000 product was a spary only aplication as I remember. Primer [IMG]http://i248.photobucket.com/albums/gg19 ... 410005.jpg[/IMG] Raw glass sanded and fairing [IMG]http://i248.photobucket.com/albums/gg19 ... t002-1.jpg[/IMG] first coat of paint [IMG]http://i248.photobucket.com/albums/gg19 ... 010005.jpg[/IMG]
Captain Larry Wren 305-360-4900 www.apirateschoice.com